Table of Contents
Blueprints are the lifeblood of any construction project, from small renovations to large-scale developments. For general contractors, understanding how to read construction blueprints isn’t just a skill it’s an essential part of ensuring project success. This guide provides a concise yet comprehensive overview to help general contractors across the USA enhance their blueprint reading skills and deliver better project outcomes.
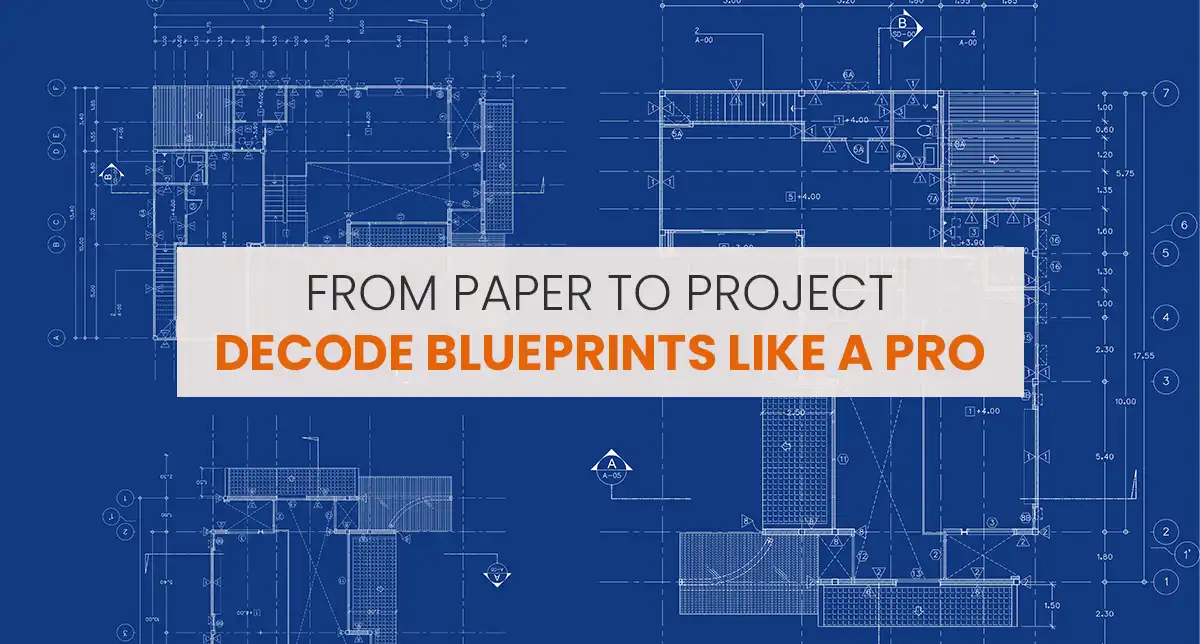
WHAT ARE CONSTRUCTION BLUEPRINTS?
Blueprints are detailed technical drawings that serve as the roadmap for a construction project. They outline every aspect of a building, from its foundational elements to intricate systems like plumbing and electrical wiring.
For general contractors, understanding blueprints means being able to plan, communicate effectively, and execute projects with precision. This skill is especially critical for managing construction projects such as architectural design projects, where attention to detail is paramount.
Focus on layouts like floor plans, elevations, and MEP drawings. Ensure clarity on elements relevant to your scope.
A plan view is an essential part of blueprint terminology. Imagine it as a bird’s-eye view of a structure from above. This two-dimensional or “flat” view is drawn as if the walls were cut in half on the horizontal plane. Each floor of a building gets its own plan view drawing, making it one of the most recognizable forms of blueprint to most people.
By understanding the intricacies of plan views, you’ll gain better insight into how each component of a building fits together. This knowledge is crucial when working on specific elements within your project’s scope, ensuring all layouts are clearly interpreted and accurately executed.
5 Key Features of a Blueprint

Blueprints are an essential tool for the construction process, providing a visual guide for contractors, architects, and engineers. The key features of a blueprint ensure clarity and precision. Here’s a breakdown of the most important elements:
1.Title Block
Purpose: The title block gives the basic information about the project. This is where you find details like:
- Company logo and contact info
- Project name, site address, and location
- Architect and client names
- Date and scale of the drawing.
- Number of sheets in the blueprint set
Location: Typically at the bottom right corner of the drawing.
2.Revision Block
Purpose: Tracks changes made to the original blueprint. It includes:
- Date of change
- Description of the revision
- Initials of the person making or approving the change
Interesting Fact: Some letters like I, O, and S are avoided to prevent confusion with numbers.
3.Grid System
Purpose: A system of numbers and letters on the horizontal and vertical axes of the blueprint. It acts like a coordinate system, allowing specific parts of the drawing to be referenced easily.
4.Notes and Legends
Purpose: This section decodes symbols, abbreviations, and provides any relevant notes specific to the project. It includes:
- General notes (for the entire project)
- Specific design discipline notes (e.g., electrical, plumbing)
- Custom symbols that the architect may use.
Symbols to look out for: These might indicate things like the building’s orientation (compass symbol) or types of doors and windows.
5.Drawing and Plan
Purpose: This is the core of the blueprint. The main area of the blueprint displays the actual construction drawings, whether they be floor plans, elevations, or system layouts, giving a detailed view of the project.
- In addition to these features, blueprints come in different sheets, each focusing on a specific part of the building (foundation, framing, HVAC, plumbing, etc.). These sheets are part of a coordinated set, with each drawing feeding into the larger plan to ensure the construction is built properly and safely.
- Would you like to dive deeper into any of these aspects, like symbols or revisions? Or perhaps you need more information on a specific type of blueprint sheet?
Types of Blueprints
1. Architectural Blueprints
These highlight the overall design and appearance of a building.
- Site Plan: Shows the building’s location on the property.
- Floor Plans: Provide a top-down view of room layouts.
- Elevations: Depict the building’s appearance from various sides.
- Sections: Illustrate cross-sectional views of the structure.
Architectural blueprints form the foundation for projects involving architectural design services, ensuring that every detail aligns with the client’s vision.
2. Structural Blueprints
Focused on the building’s framework, these are created by structural engineers.
- Include details about foundations, beams, columns, trusses, and roofs.
3. MEP (Mechanical, Electrical, Plumbing) Blueprints
Cover essential building systems:
- Mechanical: HVAC systems and ductwork.
- Electrical: Wiring layouts, circuits, and panels.
- Plumbing: Water supply, drainage systems, and pipe placement.
Types of Sheets in a Blueprint
Blueprints are divided into sheets, each with a specific focus:
G Sheets (General):
- What’s on them: Think of these as the “big picture” sheets. They show things like the site layout, property boundaries, landscaping, utility lines, and even things like driveways and fences.
- Why they matter: These sheets give everyone the lay of the land before construction starts, showing the relationship of the building to its surroundings.
A Sheets (Architectural):
- What’s on them: These are the blueprints you might be most familiar with—floor plans, roof layouts, and elevation views showing how the building will look from different angles. There are also detailed close-up drawings of certain features like windows or doors.
- Why they matter: They make sure everyone knows the building’s dimensions, materials, and layout, so nothing is left to guesswork.
S Sheets (Structural):
- What’s on them: These sheets focus on the “bones” of the building—how it’s going to be physically put together. They detail things like the foundation, framing, and load-bearing walls.
- Why they matter: Without these sheets, the building could collapse! Structural plans are key to ensuring the building is safe and sound.
M, E, P Sheets (MEP):
- What’s on them: These show the HVAC systems (heating, ventilation, air conditioning) and the plumbing for things like exhausts, fire protection, and other mechanical equipment.
- Why they matter: A well-functioning HVAC system can make a building comfortable and safe, and mechanical plans are essential for ensuring everything runs smoothly.
Symbols, Scales, and Abbreviations
Blueprints use symbols, scales, and abbreviations to convey information efficiently. Familiarizing yourself with these is crucial for accurate interpretation. Look for the legend on each blueprint, which explains these elements.
Professionals working in sustainable design projects may encounter additional symbols and notes for eco-friendly materials or energy-saving systems.
A few examples of typical plan symbols include:
- Compass symbol: Indicates the building’s orientation.
- Straight line and arc: Represents a door and shows its swing direction.
- Thick lines: Denote exterior walls, separating the indoors from the outdoors.
- Triple line: Marks the location of windows.
- Appliances: Items like tubs, stoves, and toilets are drawn in simple outline form, as they would appear from overhead.
Understanding these symbols not only aids in reading blueprints but also enhances communication during construction projects, ensuring everyone involved is on the same page.
Common Perspectives in Blueprints

Blueprints also show the building from different perspectives, making it easier to understand how everything fits together.
Plan Views (Floor Plans, Roof Plans)
- What they show: These are bird’s-eye views, showing the building from above, like a top-down map of each floor and the roof layout.
Elevation Views
- What they show: These are side views of the building, like a flat drawing showing how the building will look from the front, sides, and rear.
Cross-Section Views
- What they show: These show a “slice” of the building, cutting through it to show how things are stacked vertically, like the relationship between floors, ceiling heights, and the structure inside.
Isometric Views
- What they show: Think of these as a 3D perspective of the building, helping to visualize the overall shape and how everything connects.
Why Blueprint Reading Matters for General Contractors
Blueprints are more than technical documents—they are vital tools for success.
• Accurate Bidding: Detailed blueprints help estimate materials, labor, and costs, enabling precise bids.
• Efficient Execution: Following blueprints ensures construction aligns with design specifications.
• Communication: Blueprints facilitate clear communication among stakeholders, including subcontractors and architects.
• Quality Assurance: They serve as a reference for verifying that work meets project standards.
• Problem Solving: Blueprints help identify and address potential issues early in the process.
Contractors specializing in site evaluation and planning use blueprints to make informed decisions during the early stages of a project.
Tips for Blueprint Reading
When you’re diving into blueprints, it’s best to start with the title block.
This small, but vital section gives you a snapshot of everything you need to know—like the project name, architect details, and drawing scale. It’s your first point of reference, and getting comfortable with it will help you stay organized as you move through the plans.
Next, don’t skip the legend.
Blueprints often use symbols and abbreviations that might look foreign at first, but the legend acts as your decoder key. While you’ll refer back to it often, it’s smart to memorize the most common symbols at the start. This will help you understand what each marking means without having to constantly check.
Another crucial step is understanding the types of plans you’re working with.
Whether it’s an architectural plan, structural plan, or mechanical plan, knowing what each one covers is key to interpreting the details correctly. Not all blueprints are created equal, and what works for one project might not be relevant for another, so make sure you’re clear on what kind of plan you’re looking at.
It’s easy to get ahead of yourself, but sequencing matters.
For example, you wouldn’t want to install drywall before running electrical wiring. A construction project is a step-by-step process, and it’s easy to overlook the order of operations. A small mistake can throw off the entire schedule and, inevitably, the budget. Staying in sync with the flow of the project will help prevent costly errors and keep things on track.
Lastly, communication is key.
Blueprints are a collaborative effort, and understanding who is responsible for each part of the project will ensure everyone is on the same page. Architects, engineers, electricians, car vbnh032penters—all these professionals will need to interpret the same blueprints, and clear communication between them is essential. If everyone is aligned on the plan, the project will run more smoothly, with fewer surprises along the way.
Reading blueprints might seem overwhelming at first, but with practice, it becomes second nature. The more you familiarize yourself with the structure, symbols, and sequencing, the more confident you’ll feel navigating through them. And always remember, blueprints are a team effort—ensuring clear communication and a solid understanding of the plan will set everyone up for success.
CONCLUSION
Reading blueprints is an indispensable skill for general contractors, allowing them to navigate projects with accuracy and efficiency. From architectural designs to MEP layouts, understanding the intricacies of blueprints ensures projects are completed on time, within budget, and to the highest standards.
By applying these tips and leveraging tools, contractors can enhance their blueprint-reading capabilities, reducing errors and improving project outcomes. Master this skill, and you’ll elevate your construction management to new heights.
Faqs
What is Cross-Section View in Blueprints and what does it shows?
A cross-section view in a blueprint is akin to slicing through a building vertically to reveal its internal configuration. This perspective uncovers the essential relationships between various architectural elements, giving a clear picture of how different parts of the structure connect and function together.
Key Features of a Cross-Section View
- Vertical Slice Representation: This view illustrates the building as if it were cut in half from top to bottom, depicting the floor heights, stairway designs, and other critical features in detail. It offers a visualization of how elements like stairs appear from the side, often resembling a jagged edge or sawtooth pattern.
- Understanding Structure: Cross-section drawings are crucial for understanding the framework of a building. They display the interaction between beams, girders, columns, and joists. These are vital structural components that support the overall design but remain hidden once the construction is finished with drywall and ceilings.
- Detailed Insight: This view provides an essential layer of detail that goes beyond the surface, allowing architects, builders, and engineers to ensure that all parts of the building fit together accurately. It's a tool for preventing potential conflicts between different systems and for verifying compliance with design specifications.
By offering this internal snapshot, cross-section views are invaluable for visualizing the unseen web of structural elements and ensuring a cohesive and well-executed building plan.
What is Primary Drawing Area in a Blueprint?
In a blueprint, the central space is predominantly occupied by the core drawing or plan. This area is crucial as it visually represents various aspects of a project. Depending on the focus, it may showcase a specific viewpoint, highlight a unique feature, or delineate an entire system integral to the construction or design.
Whether it's the architectural layout of a building, the plumbing system, or the electrical scheme, this main drawing is essential for offering a clear and detailed depiction that guides architects, engineers, and builders. It's the heart of the blueprint, providing critical information at a glance.
Understanding Blueprint Lines: What Are They and What Do They Mean?
Blueprints are like the language of architecture and design. At the core of this language are the lines, each with distinct meanings that help convey the structure and function of a space. Let's explore the different types of lines utilized in blueprints and their purposes:
Object Lines
These are the boldest and most prevalent lines you'll find on a blueprint. Object lines outline visible surfaces and edges of an object as it would appear in the completed building. They help define the tangible aspects of the design, ensuring clarity and realism in representation.
Hidden Lines
Hidden lines offer insight into elements not immediately visible in the finished structure. Often depicted as dashed lines, they represent features obscured by other parts of the design, such as components on the opposite side of a wall or appliance.
Dimension Lines
Dimension lines are critical for understanding scale and measurement within blueprints. Typically marked with arrowheads, they illustrate distances—from the length and width of walls to spacing between structural elements like electrical outlets.
Center Lines
Used predominantly in symmetrical designs, center lines denote the central axis of circular or cylindrical objects. These lines are invaluable in accurately positioning and aligning features such as holes or arcs.
Phantom Lines
These lines are essential in demonstrating potential movements or positions of movable elements. For instance, they can indicate the swinging arc of a door or the alternative states of a switch.
Extension Lines
Extension lines assist in detailing the termination points of dimension lines, marking the boundaries for precise measurement without actually touching the dimension lines themselves. They're vital for adding clarity to complex drawings.
Leader Lines
Leader lines act as pointers from text or notes to specific parts of the drawing that need further explanation. These are typically drawn at an angle and ensure that every component of a blueprint has the necessary identification.
Break Lines
When space constraints are an issue, break lines come into play. These lines, often illustrated as zig-zags or wavy lines, indicate sections of a drawing that have been intentionally truncated, allowing for detailed insights without requiring endless space.
Understanding these lines is crucial for anyone looking to grasp the intricacies of architectural or technical drawings. Each line serves a purpose and contributes to the holistic communication of design plans.
Understanding the Grid System in Blueprints.
Blueprints often utilize a grid system, much like a navigational map. This system is an integral part, serving as a reference guide that enhances clarity and precision in design interpretation.
Structure of the Grid System
- Vertical and Horizontal Lines: The grid divides the blueprint into sections using vertical and horizontal lines. Each intersection forms a box that can be quickly referenced.
- Coordinates for Easy Reference: At the boundaries of the grid, you'll find numbers along one axis (usually the top or bottom) and letters along the opposite axis (usually the left or right). This creates a coordinate system similar to a chessboard.
Functionality of the Grid System
- Enhanced Navigation: By using alphanumeric coordinates, anyone reviewing the blueprint can swiftly locate specific areas without ambiguity.
- Efficient Collaboration: Communicators and collaborators can refer to exact sections using the grid system, minimizing the risk of misinterpretation.
- Simplified Adjustments: When changes or updates are necessary, the grid allows for easy identification of the affected or targeted areas, speeding up the revision process.
Overall, a grid system empowers engineers, architects, and builders to work more efficiently, ensuring that all parties involved in the project are on the same page, quite literally.
What is historical orgin of buleprint and how it evolved?
The term "blueprint" dates back to 1842, originating from the innovative work of British scientist Sir John Herschel. Herschel developed a technique known as cyanotype, where thin paper was treated with iron salts and pressed against white paper. When exposed to light, this process created detailed reproductions featuring striking white lines on a deep blue background, known as "Prussian Blue."
Originally, this method was a groundbreaking way for architects and engineers to reproduce plans accurately and efficiently. Cyanotypes were the standard technique until the mid-20th century, serving the industry for over a century.
As technology progressed, the process of creating architectural plans transformed dramatically. Today, architects predominantly rely on digital software to design and produce detailed plans. These digital tools offer enhanced precision and the ability to edit designs seamlessly a far cry from the labor-intensive methods of the past.
Despite the shift to digital technology, the legacy of Herschel’s invention lingers. The term "blueprint" has endured, even though modern designs are rarely blue. The word remains a staple in architectural and engineering lexicon, symbolizing careful planning and design regardless of the medium used.
Addressing these aspects with careful planning and the integration of advanced technologies ensures that MEP systems in skyscrapers operate efficiently, safely, and sustainably.


")


